diy solar

diy solar

5s Lithium-ion Balancer

atatistcheff

Solar Enthusiast
Joined
Sep 20, 2019
Messages
176
I'm looking for recommendations for an active balancer I can use to balance some Ryobi 18V (5s) packs. I'm finding that the included BMS doesn't do a good job once these older packs get too far out of balance. Bringing them back in line can help quite a bit with their capacity. So, I would like to find an active balancer I can use to perform first-aid on these packs and get them back to balance. Something like this: https://www.ebay.com/itm/New-Versio...hash=item2f3903ba75:m:mz2kImqKt1xusAoj8xPeDDQ

Not looking to break the bank just trying to make this balancing easier. Appreciate any experiences/suggestions.
 
I’ve used the Ryobi One+ system since the days of the blue tools / yellow NiCad batteries.

I’m well familiar with the problem you describe. I’ve inspected dozens of the various Lithium protection boards and despite seemingly complex circuitry, I’ve never once seen any evidence of any balancing capability whatsoever. No bleed resistors, transistors etc. And I’ve done tests leaving working, but unbalanced packs on the charger for days - in the green light / fully charged state - and the cell voltage differentials never move.

My method for “ balancing” is simply using 5 separate isolated 1 cell chargers, all at once, connected to the individual cells with small flat-jawed copper alligator clips. I have a plug strip with 5 of the 6 plugs occupied with 1amp apple 5w USB iPhone chargers. Each is connected to a TPA4056 1 cell eBay charger board.

If I were to build another I would probably use the newer TP5000 charger boards, and neodymium magnets instead of the alligator clips..

If you go for a similar setup, please beware of a couple critical points:

- you MUST use five **seperate** USB AC adapters. otherwise your outputs won’t be isolated from each other.

- you must be very careful to not connect any of the chargers reverse polarity. if you do then that module is instant toast, even if unpowered by USB 5v in. i recommend buy some extra modules for when/if you make this connection mistake.

- you bypass all bms protection with this method. if you want extra peace of mind you can get the charger boards with built in 1S single cell BMS protection against overcharge, overcurrent etc. I personally don’t use these because i had reliability problems with the particular ones/batch I tried. but I’ve never had an issue using the basic unprotected 4056 modules and have been using this method for around five years. And the (Samsung, LG, Sony) cells in these ryobi One+ batteries are pretty safe themselves..

This method is also quite speedy. I haven’t spent much time trying to come up with a more traditional balancer-type solution. I did try one of those new Chinese black-colored active buck/boost multi cell balancers earlier this year, and it functioned poorly.

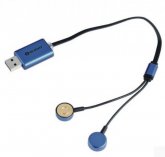
Edit: I forgot to mention that you could buy five Olight 1 cell chargers instead of the 4056 modules. They have polarity-agnostic magnetic connections with automatic polarity detection. You still need five separate usb adapters. It’s a more expensive solution but less work and is basically foolproof. Good luck !
 

Attachments

  • 92708221-3E43-43BD-92FE-63D85E35EDAE.jpeg
    92708221-3E43-43BD-92FE-63D85E35EDAE.jpeg
    26.4 KB · Views: 1
Last edited:
Thanks for the detailed response, it's great to hear about your experiences with these packs. It sounds like using individual chargers will give all the cells an equal charge. Does this "top balancing" provide all that's needed for these cells? I was thinking an active balancer could be used to bottom balance as well but maybe that's over thinking it.

I ordered 5 sets of these battery test probes thinking I could build a charging jig to stick the pack in.
Screenshot 2020-02-02 at 7.41.31 PM.png
Now the Olight chargers look promising, and there's always Chinese knockoffs for about 1/3 of the price.

You've given me plenty to think about - thanks!
 
Here is my design for a charger jig for a 5s pack. The triangles are the test probes mentioned above.

Screenshot 2020-02-04 at 12.52.19 PM.png
 
Instead of installing a BMS on every one of your battery packs, you can just install a cheap balance cable on each one, then charge the packs with a balance charger.

I have cheaper clones of this for all my small packs that don't have a BMS and it works pretty well. And gives you more control than the standard Ryobi charger.


Only problem is you'll need to drill a hole into the pack somewhere for the balance leads to come out of...
 
I grabbed some P108 4Ah battery packs from batteryhookup to see if I could get those working. I've had really good luck with the P102 packs from them, I can usually get over 80% of the packs to work either by disassembling and charging them or by just putting them in the charger. About 30% of the packs just work. I assume they are from product returns or similar and just get lumped in with all the packs that won't charge.

So I was hoping the P108s would give me similar results. However, they have been much different. So far, out of 8 packs I have not found a single one with a working BMS. Even though the pack voltage (at the main battery positive and negative connections) is fine, the BMS won't allow the battery to charge or power any tools.

At first I thought they must all be faulty but now I believe they have actually disabled the pack on purpose in response to some kind of issue. Maybe one of the cells died and the pack went out of balance or had some other issue. It seems that once the BMS sees this happen it goes into permanent failure mode. My theory is that if I could find a way to reset the BMS the pack could be made to work again.

As a side not I have noticed that the balance between the working cell groups in the batteries has been perfect. It makes me think that Ryobi added cell balancing to their BMS in their newer lithium packs. There's no other way the voltage could be exactly the same down to .01V across all the pairs in the 4Ah pack.

I don't know if it's possible to reset the P108 BMS and of course Ryobi isn't going to tell anyone how to do it. If anyone has any secrets on resetting this BMS I'd love to hear it. Otherwise, I'll have to be satisfied salvaging the 2,000mAh cells from the packs. The good news is that most of the packs are in good shape and the cells are testing at 100% capacity.
 
I'm still waiting for some of the parts to my Ryobi balancer but I got the cell probes so I started assembling. My plan is to disassemble the pack to balance it which I figure will only be needed rarely. This prevents having to drill holes in the housing. This is where the pack will be mounted.

20200217_191850.jpg20200217_191822.jpg
 
Ok, it took forever for the parts to arrive from China. The power supply boards were the ones holding up the show. Bought 8, found 5 that actually worked. I guess for about 55 cents each you can't expect quality control. Just threw this together tonight, will work on making it prettier in days to come.

20200412_200046(1).jpg

20200412_200110.jpg

20200412_200057.jpg
 
Back
Top