diy solar

diy solar

My venture into Solar and what goes with it

MGV8

New Member
Joined
Mar 23, 2024
Messages
12
Location
Canoe BC Canada
After much fussing and research I jumped in to upgrading the new to us Camper.. Reasons: It seems to be a power hog, plus maybe the batteries are old and tired My dear wife will follow me around in the house turning lights off but insists on leaving every thing on in the Camper, sure doesn't help matters It has a generator but we almost never get to use it where we camp. Plus it is noisy and rattles the whole camper. So I got the Visa card out and started ripping
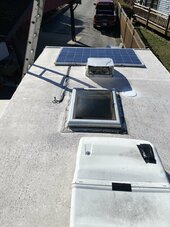
First this panel had to go.I thought is wasn't working that well but the green shite in the roof connection was probably partially to blame
IMG_9878.jpeg

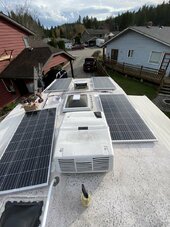
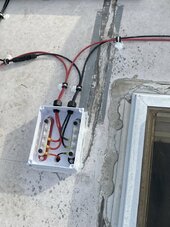
Added 4 200 watt panels
IMG_9927.jpeg

Two in series and pairs in Parallel. The Amazon buss bars are pretty good but the cheap box will probably have to be changed to something better.
IMG_9928.jpeg

first post so let's see how this goes
 
Last edited:
Then came the wiring. Mine is an Arctic Fox 996 Two slides. After tracing wires from one end to the other and much poking I realized I needed multiple connections ( Buss Bars )and needed to run a larger DC wire from the fuse box to the battery box then use the existing wires ( the generator starter wires) to the new battery box
But first

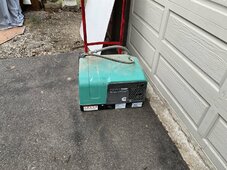
Out came this chunk of dead weight
IMG_9912.jpeg
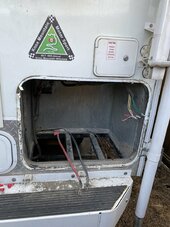
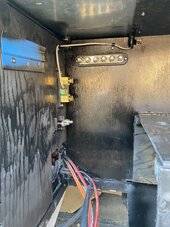
Left a nice space
IMG_9913.jpeg

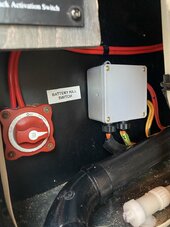
I did have to run a second 12/2 wire from where the switch was located
IMG_9916.jpeg

Switch removed and a tidier Junction box installed
IMG_9919.jpeg

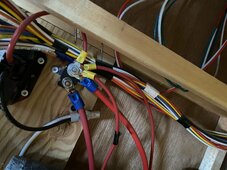
This mess needs to be dealt with
IMG_9880.jpeg
 
Last edited:
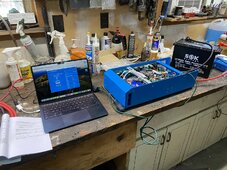
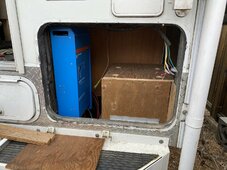
Once I had measured many times and checked numerous you tubes it was time to fully commit. Out came the AGMs. I can barely lift them. They were of suspect age but did OK for the first year of abuse.

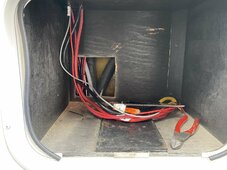
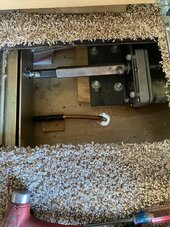
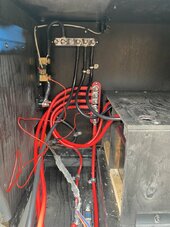
The empty battery box, About mid Camper-- I had to cut an access hole so I could run wires.. 6 gauge running from front to rear, where the main switch was, ( previous picture ) and back to the mid point. Tied to a 40 amp circuit breaker which then was tied to a 60 amp circuit breaker up front.. Worked but really RV guys?? Anyways it all got ripped out
IMG_9931.jpeg

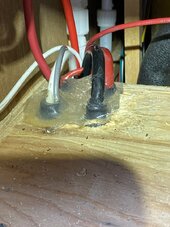
This epoxy was fun to chisel off. I needed those 2 gauge wires so was careful

IMG_9932.jpeg

Some what tidier and now I have a useful storage box below this area which is more useful as well
IMG_9933.jpeg

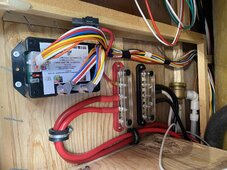
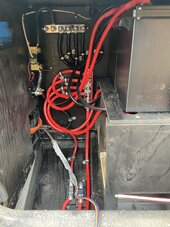
Up front under the step up to the bed - this took some sorting as the wire looms run higgle de tiggle around both the back water drain pipe and the Fresh water fill pipe and the water pressure pump -- As neat as I could do it with out tearing the entire camper apart-
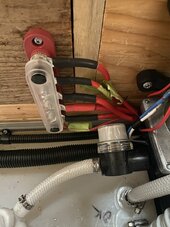
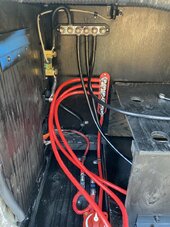
New 4 gauge wire run back to the battery box, mid ship. About 10 feet shorter
IMG_9934.jpeg

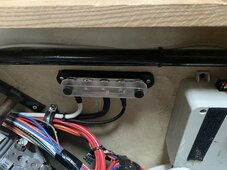
The positive buss bar in the same area. The 4 gauge with a shorter run should carry all the current I am going to pass through it. Still the Fuse box, Solar, DC-DC, the right Slide and the Power jacks all tie in here. We shall see.
IMG_9935.jpeg

Now for the fun bit
IMG_9914.jpeg

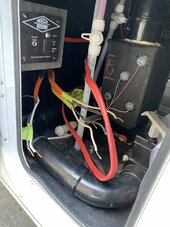
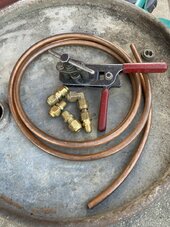
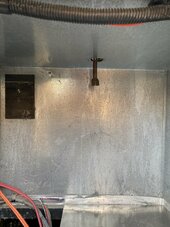
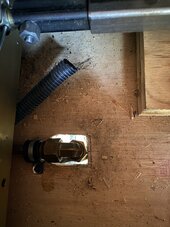
In order to use the old Generator cavity for what I wanted this propane line had to move
IMG_9915.jpeg

It was one of those one shot deals.. No second chances
IMG_9918.jpeg

At least they gave us an access
IMG_9917.jpeg

Success, now we can move on. Relief and a beverage was hd in celebration

IMG_9920.jpeg
 
Last edited:
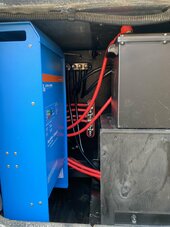
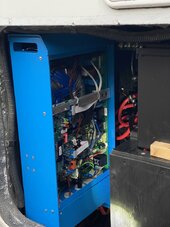
Now for the fun stuff. A bunch of Victron stuff started showing up. I had ordered through my sister, who has been in the off grid solar business for 30 plus years now.. I thought I was getting the newest Inverter but got a Compact instead. Bigger by a smidge but I had measured for the 11. But actually this one will work in my favour cause the AC connections are in a better position.
Test fitting
IMG_9936.jpeg
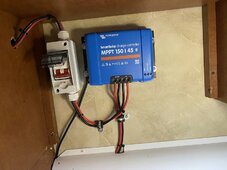
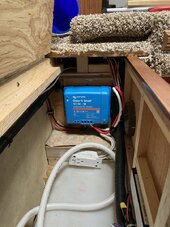
The breaker/swtich and the Charge Controller installed. New 8 gauge wires to replace the 10 gauge/ 12 gauge stuff
IMG_9938.jpeg
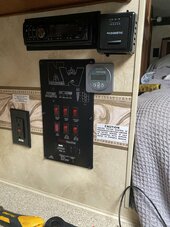
The BMV 712 install. I fussed over placement and decided on this then promptly realized my mistake once the hole was drilled. I made it work
but just -- Running the com wire took a whole day !!!
IMG_9940.jpeg

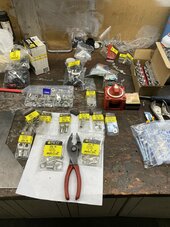
The bits and bobs are adding up
IMG_9944.jpeg

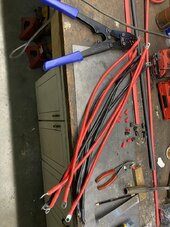
Spent and after noon making a bunch of these
IMG_9945.jpeg

Started planning and fitting hardware
IMG_9946.jpeg

Test fitting
IMG_9947.jpeg

Making up assemblies
IMG_9949.jpeg

Had some communication issues at first but a few Emails back and forth with my distributor and it was sorted. Programmed for the SOKs that I am using
IMG_9950.jpeg

Final stages of the planning
IMG_9951.jpeg

Batteries going in. Powered up and no Smoke. Yet!
IMG_9954.jpeg

This part is done All 4 batteries are live
IMG_9955.jpeg

Tight courters but the plan is working
IMG_9956.jpeg

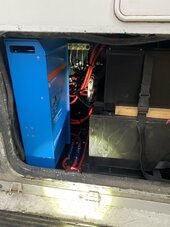
All buttoned up, AC hooked up and working.. Haven't tested shore power yet but I am confident
IMG_9958.jpeg

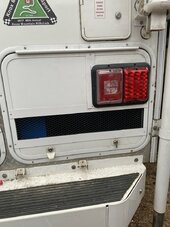
Door back on and you can hardly tell.. Actually I am going to fill behind the grill. So this will be more sealed up. I did cut a big hole into the basement of the camper, for venting and for heat into the battery compartment
The Smart dongle hasn't arrived yet but should be a simple install. That way I will have remote on and off and be able to switch between good and sketchy shore power. I was going to wire in a remote switch but it seem you can only do one or the other with this inverter so the phone will have to do.
IMG_9959.jpeg
 
Last bits are falling into place
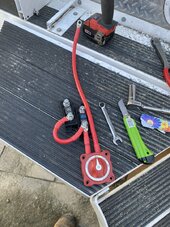
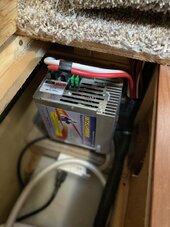
The DC to DC arrived-- yeah it is a little guy but then this Camper is on an old GMC with an iddy bidy Alternator. If I ever upgrade the truck I can up grade this unit. I figure with the Solar combined with this while driving down the road I should arrive full of charge .
IMG_9975.jpeg

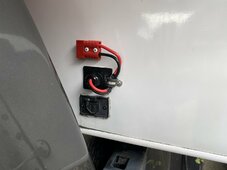
Ran new wires to the front of the camper and installed a new harness on the truck
IMG_9978.jpeg

And this got taken out and put on the shelf

IMG_9898.jpeg


So that is just about a wrap.. A bit of tidy up and such left to do but I think we are going to have way more than we need and I can now share up the E bikes any where I want. Bonus.
 
Your user name caught my eye. By chance, is it a reference to an MGB with a V8 conversion? I drove a 1973 MBG GT in high school that I fixed up. Then got a 1980 MGB LE in college. Loved them but we had a saying for the electrical bits: Why do the English drink warm beer? Their refrigerators are made by Lucas.
 
You might be fine, one thought... the AC unit will shade the panels next to it. I assume the two next to it are in series. Shading just one credit card sized area of one panel will decrease the panel output more than you can imagine. Consider how to remedy, maybe put the two as stand alone panels (one panel to one controller to the battery bank) so when one is shaded the other can be at its best.

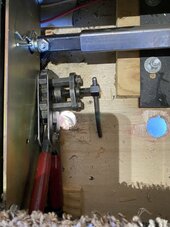
Side note, (5th pic, second post) when crimping the connectors make the indent on the opposite side of where the lug folds over to make the tube. That is usually on the other side from where you made it. Putting the indent on the slot is not the best practice. I use the crimp tool on plastic sleeves, but you are supposed to use the squeeze tool, not the one with the tooth indent when crimping one with the plastic sleeve. I wouldn't re-do it now, it should be fine, but for future now u know. Looks good otherwise
 
Your user name caught my eye. By chance, is it a reference to an MGB with a V8 conversion? I drove a 1973 MBG GT in high school that I fixed up. Then got a 1980 MGB LE in college. Loved them but we had a saying for the electrical bits: Why do the English drink warm beer? Their refrigerators are made by Lucas.
In my younger years I built an MGB Race car for our local Hill climb-- Tube frame and skinned it with old B parts Had lots of success and fun. But retired from that now 4.6 Rover with lots of fancy bits image-2.jpeg
 
Great work!!!
All that amazing blue but no Cerbogx? Also are you concerned about shading from the AC on those panels?
 
You might be fine, one thought... the AC unit will shade the panels next to it. I assume the two next to it are in series. Shading just one credit card sized area of one panel will decrease the panel output more than you can imagine. Consider how to remedy, maybe put the two as stand alone panels (one panel to one controller to the battery bank) so when one is shaded the other can be at its best.

Side note, (5th pic, second post) when crimping the connectors make the indent on the opposite side of where the lug folds over to make the tube. That is usually on the other side from where you made it. Putting the indent on the slot is not the best practice. I use the crimp tool on plastic sleeves, but you are supposed to use the squeeze tool, not the one with the tooth indent when crimping one with the plastic sleeve. I wouldn't re-do it now, it should be fine, but for future now u know. Looks good otherwise
Yeah, I thought about that a lot. Each side is in series. My thinking is at least two panels should be in full sun. Either way I have 4 times as much as I had before, or maybe two times if I have a lot of shade. :) I had to be careful as I only had 10gauge wires going into the camper which I couldn't change unless I drilled a new hole in just the right spot. At first I was going to run them all in parallel but the possible current would have exceeded my wires. So this way I have a max possible of 46 volts and 22 amps. With in reason. The controller should convert that to a good charge current. I haven't seen any real potential yet cause my batteries are full. :)
And those crimps are from the RV guys. Not mine, LOL That is the bunch I deleted. That is the 40 amp circuit breaker on a possible 60 amp circuit :-0 Gone! I have the correct squeeze crimper for those style of terminals. When I get the chance I will run the thermal imager over my connections to see if any thing is getting warm.
 
Great work!!!
All that amazing blue but no Cerbogx? Also are you concerned about shading from the AC on those panels?
I may add a Cerbo at some point. Got to play with one the other day as I was helping some one else with their system. Regrets now but there is a limit and it would have added 800 bucks to my cost. I spent enough for now. :)
I expect shading, not much I can do except live with it. We camp a lot in the forest as well. I try to park so I am not as affected. We shall see.
800? It's $217.60 maybe $30 more in cables since you need a couple vedirect cables and network cables. You don't need the touch screen you can use your phone
 
800? It's $217.60 maybe $30 more in cables since you need a couple vedirect cables and network cables. You don't need the touch screen you can use your phone
This is Canada-- Cerbo GX on sale. 373.00 Touch screen GX 50 298.00 Plus cables and taxes. :-0
 
This is Canada-- Cerbo GX on sale. 373.00 Touch screen GX 50 298.00 Plus cables and taxes. :-0
Get a Cerbogx-s they're much cheaper and skip the screen. You can buy one later if you want. At least with it you can log everything and view over wifi. The smart dongle is pointless
 
Get a Cerbogx-s they're much cheaper and skip the screen. You can buy one later if you want. At least with it you can log everything and view over wifi. The smart dongle is pointless
OK, Still learning. My thoughts on the Smart Dongle was that I can run the temp sensor into it which then I should be able to set a limit to stop Charging from both my solar or the Multiplus a few degrees above the cut off of 0c of the SOK Batteries BMS. I have the Marine ones which don't have heaters built in. It is More for a safety factor than any thing. We have had multiple mornings below freezing for the last couple of weeks. Doesn't warm up till long after my panels are wanting to start producing power.
Plus I can turn the Multiplus on and off at will with the phone App because I really won't be needing AC power most of the time. I was going to, actually did using existing Generator control wires , wire in a remote switch to do this but now am planning to use the App. I may add a Cerbo later.. I will have to look at the "S" version. Don't know about it
 
Back
Top