diy solar

diy solar

Updating V1 of the EG4-ll batteries... I have a few questions

SniperX

Solar Enthusiast
Joined
Apr 1, 2021
Messages
359
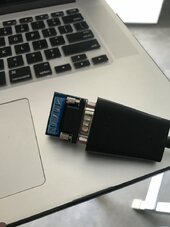
I received the newer cord from SS! BIG shoutout to Jarrett for taking care of it.
I have the V1 of these batteries.
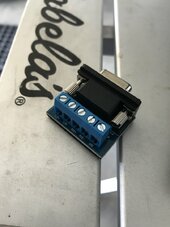
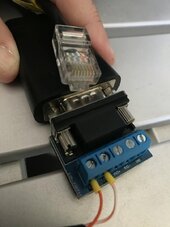
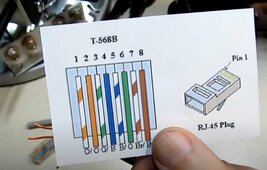
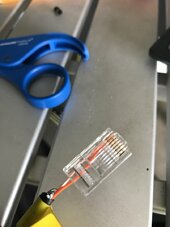
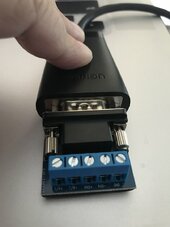
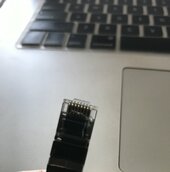
Can someone help me understand how to wire the cord with the CAT5 cable going to the blue end?
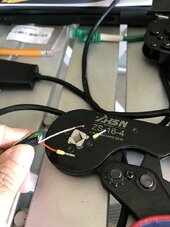
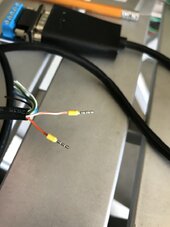
I know that the orange wire goes to the T/r+ and the orange/white wire goes to the T/r-, but do I need to cut the end off the other side of the cord and just wire the orange and orange white wires in the connection or can I just leave it the way it is?

Second question:
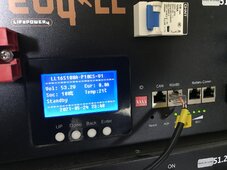
Does the breaker need to be on or just the on/off switch?

Third question:
Does it get plugged in to the battery (two openings on the right side) or does it go into the RS485 plug next to the CAN plug to update?

THANKS for helping in advance.
 

Attachments

  • E7F05E1C-5B5A-400C-AD28-33F11FB3F6E1.jpeg
    E7F05E1C-5B5A-400C-AD28-33F11FB3F6E1.jpeg
    84.1 KB · Views: 3
  • C1730A24-3C1C-470B-8308-0E0879494F71.jpeg
    C1730A24-3C1C-470B-8308-0E0879494F71.jpeg
    148.9 KB · Views: 4
  • 0770A5A5-3A34-4917-BB3B-F97F6881EA9D.jpeg
    0770A5A5-3A34-4917-BB3B-F97F6881EA9D.jpeg
    80 KB · Views: 4
  • 3C4CF4B0-9B80-44A9-905E-DFAD876FD0C7_1_201_a.jpeg
    3C4CF4B0-9B80-44A9-905E-DFAD876FD0C7_1_201_a.jpeg
    77.2 KB · Views: 4
Last edited:
In case anyone needs this info:
Attach the blue piece to the end of the cord like the photo 1 and 2.
Tighten the screws to keep it from coming apart.
Cut one end of a CAT5 cable using the Orange and Orange/White wire only (my CAT5 cable was 24AWG, so I ordered tiny 24AWG ferrules and crimped them) See photo 3 and 4.
I inserted the Orange Wire with ferrule into the T/r+ and screwed down, and the Orange/White wire into the T/r- and screwed down.
See photo 5.
Then, I cut off the other end of the CAT5 cable, and used this reference photo for pin-out locations (see photo 6) and made sure the RJ45 connection was positioned so the clip is on the bottom and I inserted the Orange/White wire in Pin 1 and the Orange wire in Pin 2 and crimped them with a RJ45 connecting crimper to seat them in the clip. (photo 7) I used a CAT5 crimper (photo 8)
Then, I inserted the newly crimped end of the RJ45 connection into the RS45 port next to the CAN port (not the battery ports) (Photo 9)
and the USB end of the cord into my computer.
Turned my EGll V1 battery on but did not turn the breaker on.
Opened the file, imported the Schneider hex file, made sure my com was the right one (computer recognized the USB connection), BAUD rate was 9600, my dip switches on the battery set to all zeros for it to be the "Master", (battery not hooked to any other battery), opened the com, then hit update. Waited until it hit 100% (green bar) and then the BMS initialized itself again, and then it was done!
Then, all you have to do is make sure the next battery you need to update has the dip switches down, it is not hooked to any other battery, take the RJ45 plug and put it into the RS45 port next to the CAN port and start the updating process again. Each battery is updated following this process. Be sure when you are finished to keep one battery set as the master (all switches down) and then assign each consecutive battery a unique address. (photo 10)
 

Attachments

  • 95CA5873-F6A5-42B6-B40F-4A50C93AB25B.jpeg
    95CA5873-F6A5-42B6-B40F-4A50C93AB25B.jpeg
    112.1 KB · Views: 2
  • 0770A5A5-3A34-4917-BB3B-F97F6881EA9D.jpeg
    0770A5A5-3A34-4917-BB3B-F97F6881EA9D.jpeg
    80 KB · Views: 1
  • 09C02795-6033-4DB9-BF79-3EE3FB795FAD.jpeg
    09C02795-6033-4DB9-BF79-3EE3FB795FAD.jpeg
    113.4 KB · Views: 1
  • 8AA54EF6-42F9-4D9D-83C1-7B58AE2B29C8.jpeg
    8AA54EF6-42F9-4D9D-83C1-7B58AE2B29C8.jpeg
    79.4 KB · Views: 2
  • EF70AF3D-FA36-4A31-A30F-8D56E440DB60.jpeg
    EF70AF3D-FA36-4A31-A30F-8D56E440DB60.jpeg
    96.8 KB · Views: 2
  • 45E2F5E3-F62A-41CC-AB33-3163FFA9DCC1.jpeg
    45E2F5E3-F62A-41CC-AB33-3163FFA9DCC1.jpeg
    152.8 KB · Views: 3
  • 0D37A60D-08ED-4A72-9B6F-8B6F2C7283C4.jpeg
    0D37A60D-08ED-4A72-9B6F-8B6F2C7283C4.jpeg
    87.2 KB · Views: 3
  • BAFA93F1-C21F-42A1-8B28-AB757700CA65.jpeg
    BAFA93F1-C21F-42A1-8B28-AB757700CA65.jpeg
    107.5 KB · Views: 2
  • C5AC78E4-77EF-4FB0-8052-09C42D57339F.jpeg
    C5AC78E4-77EF-4FB0-8052-09C42D57339F.jpeg
    268 KB · Views: 2
  • EED628B9-A85E-49A5-9D45-B21DEF821C4E.jpeg
    EED628B9-A85E-49A5-9D45-B21DEF821C4E.jpeg
    133.8 KB · Views: 2
  • C741312C-5FA7-49B4-8FCB-A07917CD3F4D.jpeg
    C741312C-5FA7-49B4-8FCB-A07917CD3F4D.jpeg
    143.7 KB · Views: 2
  • 18805162-628E-4C8A-BEEF-36AACE1B9F70.jpeg
    18805162-628E-4C8A-BEEF-36AACE1B9F70.jpeg
    317.9 KB · Views: 2
  • 3BECC2B0-AEF2-4E80-BAFF-6351F680E858.jpeg
    3BECC2B0-AEF2-4E80-BAFF-6351F680E858.jpeg
    146.8 KB · Views: 2
Last edited:
Back
Top