diy solar

diy solar

fifth wheel roof mounted panel, what is best brackets,

rockwind1

Natural selection intervention specialist
Joined
Nov 19, 2020
Messages
67
Location
Az
i was getting ready to putting 4 430 watt panels on my fith wheel roof, they are 67'x41" i believe, i was just going to get some 3x3" aluminum angle stock and cut 4 or 5" pieces. what are all the cool guys using?
 
I used 2” “L” angle stock .125” (from On Line Metals). I made mine 6” long.

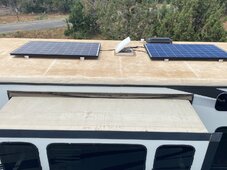
I used eight prices per 200w panel - bolted four to the corners of the panel and the other four were attached to my Fiberglass roof - VHB Tape, plus a roof screw - Dicore over everything. Mine are in a “C” shape. A 1/4” bolt to act as a hinge or keep them together.

I wanted to be able to tilt the panels (and I do when we are parked the correct direction and we need the power and we are staying long enough to be worth it).

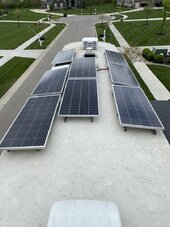
When my dad installed larger panels on his 5th wheel - he used 1.25” angle alum stock and then used 8 fastener locations (3 on both long sides and I in middle of short side). He made his a “Z” shape and no tilting.

Good Luck
1.25 angle doesn't seem like much room but maybe it didn't go all the way up the sides of the panels?
 
I think you can zoom on my dad’s brackets in the photo.
IMG_3171.jpeg

He cut two 3” pieces. One he bolted onto the bottom of the solar panel frame, the other was screwed into the roof. Then he bolted the two brackets together. It made a “Z” shape (except 90 degree bend instead of 45).

I remember incorrectly- he used 6 sets for a 250w panel.

The roof had a small crown to it - he drilled and bolted the brackets.

Hopefully now it makes sense.
 
It has Dicor on it - I think this photo was taken towards the end of the project- before that step.
 
I think you can zoom on my dad’s brackets in the photo.
View attachment 211256

He cut two 3” pieces. One he bolted onto the bottom of the solar panel frame, the other was screwed into the roof. Then he bolted the two brackets together. It made a “Z” shape (except 90 degree bend instead of 45).

I remember incorrectly- he used 6 sets for a 250w panel.

The roof had a small crown to it - he drilled and bolted the brackets.

Hopefully now it makes sense.
thanks, that is how i imagined it.
 
Back
Top