diy solar

diy solar

Luyuan battery case

There should only be one point of connection between all earth grounds (rods) and all "grounded" metal things above the earth. Otherwise you create multiple paths for problem currents to get to ground.
Thanks for the reply ksmithaz1
My Solark inverter is also in the shed with my batteries. The Solark wires run through my roof to the main breaker panel at the service entrance 50 feet away. The main breaker panel ground bar is connected to a ground rod near the service entrance.
Are you saying that I should connect my battery ground wire to the ground bar in the Solark?
Or should I run a separate ground wire through the roof of my house to the the ground rod that is 50 feet away near the service entrance?
 
Last edited:
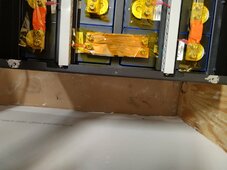
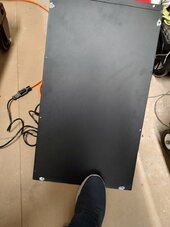
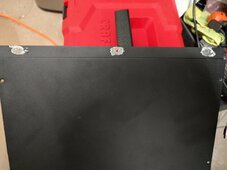
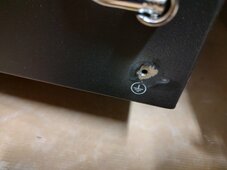
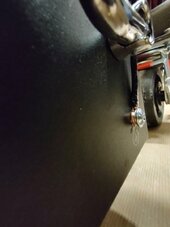
I bonded the front panel and the top cover to the main part of the case.
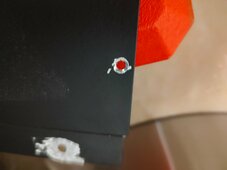
I used a small stone in a Dremel to clean the paint out of the chamfered holes. I used a carborundum wheel to clean the flat spots. I also used it to grind under the back sides that I couldn't see. Wear safety glasses and cover everything with towels to keep grinding dust off everything.
A black magic marker works great for touching up sloppy grinding.
main case bonded.jpgcover 1.jpgcover 2.jpgtop corner ground.jpgground hole cleaned up.jpgwire screwed on bottom case.jpg
 
I bonded the front panel and the top cover to the main part of the case.
I used a small stone in a Dremel to clean the paint out of the chamfered holes. I used a carborundum wheel to clean the flat spots. I also used it to grind under the back sides that I couldn't see. Wear safety glasses and cover everything with towels to keep grinding dust off everything.
A black magic marker works great for touching up sloppy grinding.
View attachment 215695View attachment 215696View attachment 215697View attachment 215698View attachment 215699View attachment 215700

With my luck I would short positive to the case and that wire would turn to plasma on me:)
 
With my luck I would short positive to the case and that wire would turn to plasma on me:)
LOL, I am ignorant as hell about this stuff. But I figure the ground screw is there for a reason.
It's not a big deal to connect the wires. I will probably connect them to something
 
TBH, Sorry but you got terribly carried away and totally over did it.... Now you have all those spots that can rust up and cause other issues.
I am of the camp where Lightning Control & AC / DC Electrical ground are 3 separate items with a cautious relationship. That camp means dealing with the AC & DC grounding differently than dealing with Lightning Control & Management.

The battery Cases should be considered as DC Ground and therefore could be grounded the same as the SCC, Inverter/Charger/AIO to the common bonded earth ground circuit.

Solar Racking, Panel Frames are "not electrical" as such, there is no power flowing through that, they can be subject to Lightning (like that lone tree in a field, which you never stand under in a lightning storm) and that must be dealt with accordingly.
 
Thanks for the input Steve. I've seen a lot of people over do it more than me. :rolleyes:
Everyone is learning here and you have a lot of great advice.
I did reduce the # of bonding spots on the other cases. It takes about 10 min.
My batteries are sitting in an air conditioned shed so rust will not be an issue for me. When I am done, no one will see the spots I ground the paint off.
 
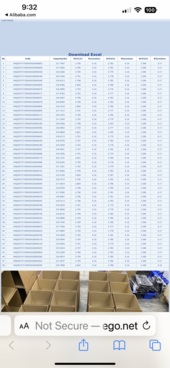
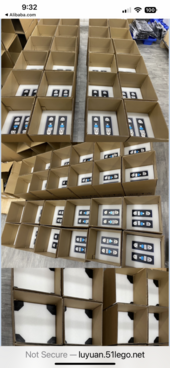
What’s in this order just cells, or cells and say 8 more cases?

48-304ah cells
Six more cases, two 24v and four custom 12v with two BMS in each box.
Ten JK BMS
Twelve JK 4.3” screens
Ten On/off buttons
Ten rs485
Twenty flexible buss bars for LF280N cells
8 meters 2ga 200deg. silicon wire, 4 red and 4black
Two extra box kit breakers
And extra fasteners for everything.

I think I forgot a few things but that is basically it.
Did you have to specify the flexible bus bars?
 
No she said they were included with the cells, but I have older LF280N that I needed flexible bars for so I ordered 20 extra for them.
Just to NOTE:
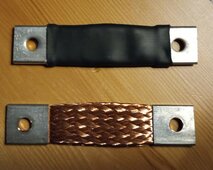
Amy carries the Laminated Busbars for between cells (these are dual-hole) and single-hole copper mesh busbars for single Post/Screw cells.

1716111943209.jpeg
<- After I put 3/4" Shrink Wrap with Adhesive.

!! CAUTION !! The heat-shrink will try to crush the copper making it hard to bend into a curve (hoop). Heat it slowly.
 
Do they give you the different flexible busbar to turn the corner on the two row arrangement? I like the double hole flexible busbar.
 
Back
Top