diy solar

diy solar

My Eve Lifepo4 LF280K Dual Terminal 4S1P Battery Build

featherlite

Solar Enthusiast
Joined
Jul 10, 2020
Messages
516
Location
Southern Indiana
I bought four "Grade A" 280 Ah cells in April, 2022.

Below is a photo disclosing the degree of bloat taken at the time of receipt and unboxing of the cells.
My understanding is that this degree of bloat is "typical" with these large AH cells. The gap shown below is about 1/8 inch.

I will post more photos of my build in due course.


tempImagerOREYD.png
 
Seems like a lot but maybe the bottoms are touching so the gap is exaggerated a bit at the top.

I recommend assembling with light compression-restraint in the final series configuration. This to avoid disassembly after a parallel top balance. Even better skip the parallel top balance and just put in service. Limit the charge voltage if needed. Possibly do a manual cell by cell balance if needed or add an active balancer.

I would assume these cells are fine. Like the terminals.
 
Thanks for your comments time2roll,

Yes, good point, the bottoms of the cells are touching so as to exaggerate the gap a bit.

Last week, before I read your post, I rigged up a makeshift "compression" jig so I could start testing the cells as soon as possible after I received the cells from the supplier. I wanted to test the cells before the thirty day return policy expired. This is my first purchase of Lifepo4 cells and it took me a lot longer to test the cells than I had anticipated. Consequently, I missed the expiry date. However, I am satisfied with what i have, albeit the cells might not be perfect.

The photo below shows the white plastic cooking sheets I purchased from Walmart to serve as insulating dividers between the cells and the jig.
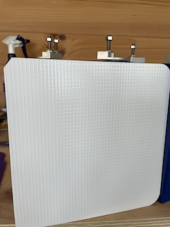
tempImageGrOdRT.png


As it turns out, those white plastic dividers were a bad idea because they embossed grooves into the aluminum surfaces of the cells.
The embossing is disclosed in the photo . tempImageKgdVfn.png


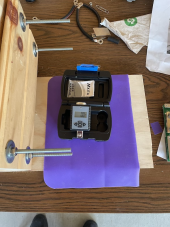
Below is a photo of the makeshift, temporary jig I used.
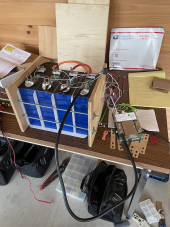
tempImagevxddpl.png

When the cells arrived, I had no idea the state of charge. As it turns out, the SOC was about 50%.

I first tightened the nuts on the jig hand tight, firmly with my fingers.

Then I assembled the pack into a 12v battery and discharged the 12v battery to about 10% SOC with a 20Ah load.

At 10% SOC, I noticed that the nuts on the jig had loosened to the point where there was very little, if any, clamping force.

So, at 10% SOC, I hand tightened the nuts again and added a bit of extra force hoping that I could possibly unbloat the cells. The total amount of force was not measurable by my digital torque wrench.

Then, with the cells still in the jig, I cycled the 12v Battery by charging at a 25Ah rate to 90% SOC and then discharged the 12v Battery with a 25Ah load until 20% SOC. At not time did the battery or terminals get warm.

At a 20% SOC, I removed the jig and noticed the embossed grooves on the sides of the cells.

So, I continued with my testing and learning. More to come later.
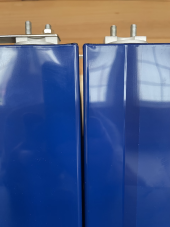
 
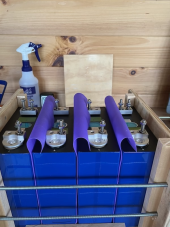
Referring to the photo below, I replaced the white plastic dividers between the cells with some silicone baking sheets … purple was the only color the store had. The silicone sheets are thin but are fairly robust and resistant to tearing and punctures.

The nuts on the threaded rods are torqued just enough so that the cells do not fall out of the jig when I lift the jig by the side boards. At that torque, the meter does not even register 1Nm.

tempImageWcXbQW.png

Referring to the photo below, I still need to trim the tops of the silicone dividers.

I used 6mm x 35mm stainless steel grub screws with allen heads, and SS nuts, flat washers and split lock washers, for the terminal posts.

I decided to use blue thread locker (approx. 110 in. lbs. breakaway torque) on the terminal post rather than red thread locker (approx. 228 in. lbs. breakaway torque) in case I ever need to remove the posts.

I used thread lock primer on the threads before application. The specs for both Loctite and Permatex thread locker say that, with “inactive metals” like stainless steel and non alloy aluminum, primer should be used. Otherwise, the product will achieve only 50% of holding power.

tempImageZfjgwb.png

So far, in my testing of the cells, I have only torqued the grub screws enough to compress the lock washers plus a little extra hand force until i feel a bit of resistance. When so done, the torque meter registers about 2Nm.

I top balanced the cells and after cycling the battery a few times, with about 20Ah, I experienced no temperature rise above ambient at the terminal posts or anywhere else, using the mild torque values referred to earlier.


More to come later.
 
Last edited:
Back
Top