diy solar

diy solar

Whole roof solar replacement

justinm001

Solar Addict
Joined
Dec 18, 2022
Messages
1,573
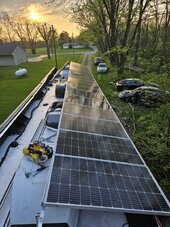
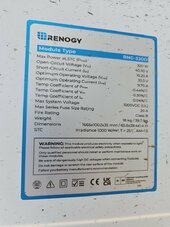
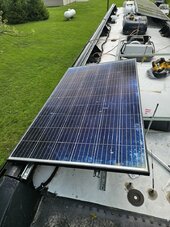
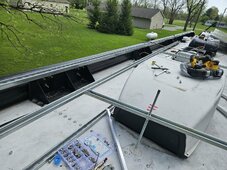
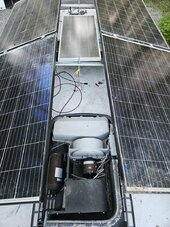
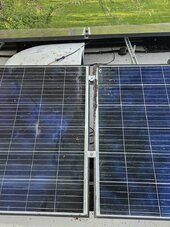
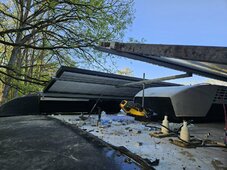
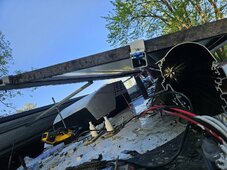
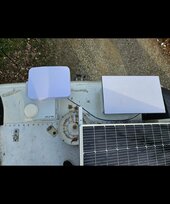
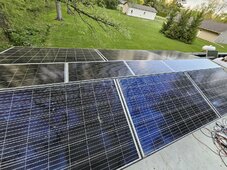
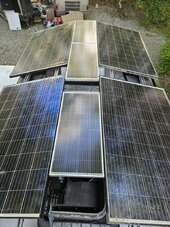
Finally getting around to upgrading my panels. I'm trying not to drill anymore holes in the roof so plan is to utilize the Girard awning brackets and the threaded rods I initially installed. I'll be mounting these Renogy 320w panels horizontal and tilted up a bit to get above all the ACs. I'll be using superstruts and aluminum angle. 6 panels on each half should net me 3840w. I should have 10 inches or so flat in the middle so hoping to find slim panels and get 500w+ then add panels in the front as an air deflector and get a couple hundred more watts. Trying to get as much as 5000w as possible.

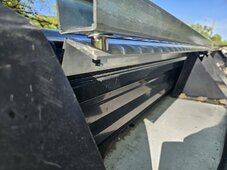
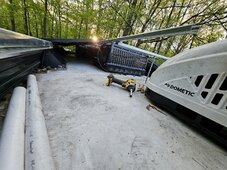
It'll have full size superstruts on the awning sides then half size by the ACs. Then will put half size superstruts through the threaded rods to connect each half together. I plan on adding 1in pvc piping over the rods to help support additional weight on the roof.

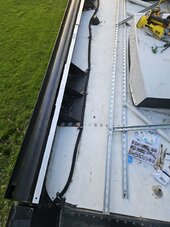
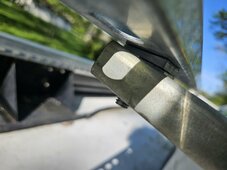
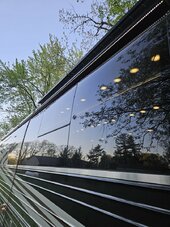
Just added aluminum angle to one side of the awning, wedged between the awning brackets and the awning itself. I'm having an issue with the angles as everything's 90s and connected together so looking for wedge washers or something.

More to come, any suggestions or comments?
 

Attachments

  • 20240428_071907.jpg
    20240428_071907.jpg
    297.2 KB · Views: 13
  • 20240428_071910.jpg
    20240428_071910.jpg
    221.1 KB · Views: 13
  • 20240428_074910.jpg
    20240428_074910.jpg
    151.6 KB · Views: 13
So far so good. I have some angle washer things from Amazon coming tomorrow so hopefully they'll work to adjust the angle of superstruts.

Have to determine if and how much I want the panels to overhang the awnings. My roof is super curved so there's lots of room but worried about crosswinds while driving hitting the panel at freeway speeds
 

Attachments

  • 20240428_111741.jpg
    20240428_111741.jpg
    271 KB · Views: 6
  • 20240428_111544.jpg
    20240428_111544.jpg
    394.6 KB · Views: 6
  • 20240428_114819.jpg
    20240428_114819.jpg
    446.3 KB · Views: 6
  • 20240428_121145.jpg
    20240428_121145.jpg
    288.1 KB · Views: 6
The wedges seem to work perfectly and have almost the perfect angle now. Got them test fitted and seems I have more room than I thought and these Ecoworthy bifacial panels are 18in wide and might be perfect for a center row of panels.

Still need to finish installing the brackets and everything on the rest of the coach then once I'm certain how it'll clear the other AC's I can adjust the panels and get a final fit. I feel they're too angled and are trying to slide off the brackets when unsecured so worried the clamps will get loose overtime and a panel will fall off the roof.

I'm debating if I should just screw the panels into the superstruts directly and make them permanent instead of using the clamps. It'll be much more secure and stable but a nightmare to remove if needed. Also I can save that few inch gap and even seal between the panels to make it water-tight and basically add an additional roof. I'm kinda curious if this would help insulate the roof or make it worse. Adding a large airgap would work like a house attic but with the AC's up there running it might get too hot, I could add fans in the rear to circulate air.

I'm not certain on how to mount the middle ecoworthy panels but thinking of screwing them into the 320w panels then it'll help hold everything in place and prevent the large panels from wanting to slide. Then if I need to work on the ACs or something I can just unscrew the 320w brackets and lift that entire section (both 320w's and the 100w) then place ontop of another section. Problem is the 100w panels are about 2/3 the length of the 320w.

These 2 panels are 11ft long so I'm hoping to be able to fit 6 320w panels on each side plus 10 100w panels in the middle giving 4840total watts. This will leave 3+feet in the front and rear and eventually I'll add panels in the front as a wind deflector so will get to my goal of 5000w.

I'm debating whether to run the large panels in series of 2 or 3 panels. Voc 40.30 Vmp 33. I'm pulling 60-65volts off 2 panels and I think I need like 57Volts to get above charging for the 48V system. I'll be running 3 MPPTs, one for each side then one for the middle. Eventually adding a 4th for the front panels going to my 12V system. Plus a 5th MPPT for the trailers 1600w.
 

Attachments

  • 20240430_172612.jpg
    20240430_172612.jpg
    157.6 KB · Views: 8
  • 20240430_172601.jpg
    20240430_172601.jpg
    207.8 KB · Views: 8
  • 20240430_200159.jpg
    20240430_200159.jpg
    254.1 KB · Views: 8
  • 20240430_195729.jpg
    20240430_195729.jpg
    254.1 KB · Views: 6
  • 20240430_195459.jpg
    20240430_195459.jpg
    295.6 KB · Views: 6
  • 20240430_190122.jpg
    20240430_190122.jpg
    274.6 KB · Views: 7
  • 20240430_190148.jpg
    20240430_190148.jpg
    409.8 KB · Views: 7
  • 20240430_190152.jpg
    20240430_190152.jpg
    334.3 KB · Views: 8
Definitely provide paths for air flow so that the hot air can rise off the panels as much as practical.

My vote is to do everything possible to ensure that they are very securely mounted. Possibly even using the nuts with the plastic lock - I think they are called nylocks or something like that.

Bolts and nuts have a way of coming loose over time on a vehicle - having a way to get in there and checking them annually ( if possible ) might be worth it.
Theres plenty of room between the panels and roof for the panels to stay cool. The problem is the AC units and them pumping hot air under the panels if they're sealed up. I ordered 2 more ruuvi temp sensors for up there so will see.

The rear has all my comms (starlink, cell booster, wifis) so will be open and can put a large fan to kick in to suck air out if everything's sealed. Just program if ac is on and temps are x to kick on.

I'm with you. I could out locktite and such to keep the screws locked but with how it clamps I'm worried it'll get loose. It's angled to the point I have to hold on to them when clamping down because it'll slide off. I also have 6 ACs so if it's a pain to get the panels off they can wait a while if broken. I can go without a few of them.

There's almost enough room where I could just crawl underneath the panels. It might make sense to just unscrew all the ACs and crawl in there to bolt them all nice and easy then slide the ACs back since they all just bolt from the inside.
 

Attachments

  • Screenshot_20240501_104440_Gallery.jpg
    Screenshot_20240501_104440_Gallery.jpg
    170.4 KB · Views: 1
Made some progress. Decided to screw the 100w panel into each slide then they counter balance each other and can easily slide back and forth together. There's enough room I can barely lay down between panels and slide them together then screw then back apart and crawl out. Also lowered the panels down so they just barely touch the ACs.

Only the front row is screwed to the superstruts the others are just freefloating for now. This is about half done. Once I get the other half of the panels done I'll make a few adjustments to straighten everything up and then screw down.

To screw down I'm thinking I'll use the nuts that go inside the struts and put 2-3 on each side then just hand tighten them so they slide back and forth then just tighten the back set of each. This way I can just loosen the back panel then slide it back and do the same to the rest. I'm mostly worried about crosswinds lifting them up from the side and not so much front/back. The very front panel will be very tight on all sides... Just incase.

BTW super glad I picked up those ecoworthy panels at an auction. Got all 6 new in box for like $40. Now gotta hunt down 4 more and pay retail
 

Attachments

  • 20240501_193858.jpg
    20240501_193858.jpg
    539.9 KB · Views: 6
  • 20240501_193923.jpg
    20240501_193923.jpg
    452.1 KB · Views: 6
  • 20240501_183448.jpg
    20240501_183448.jpg
    324.6 KB · Views: 6
Back
Top